![]()
![]()
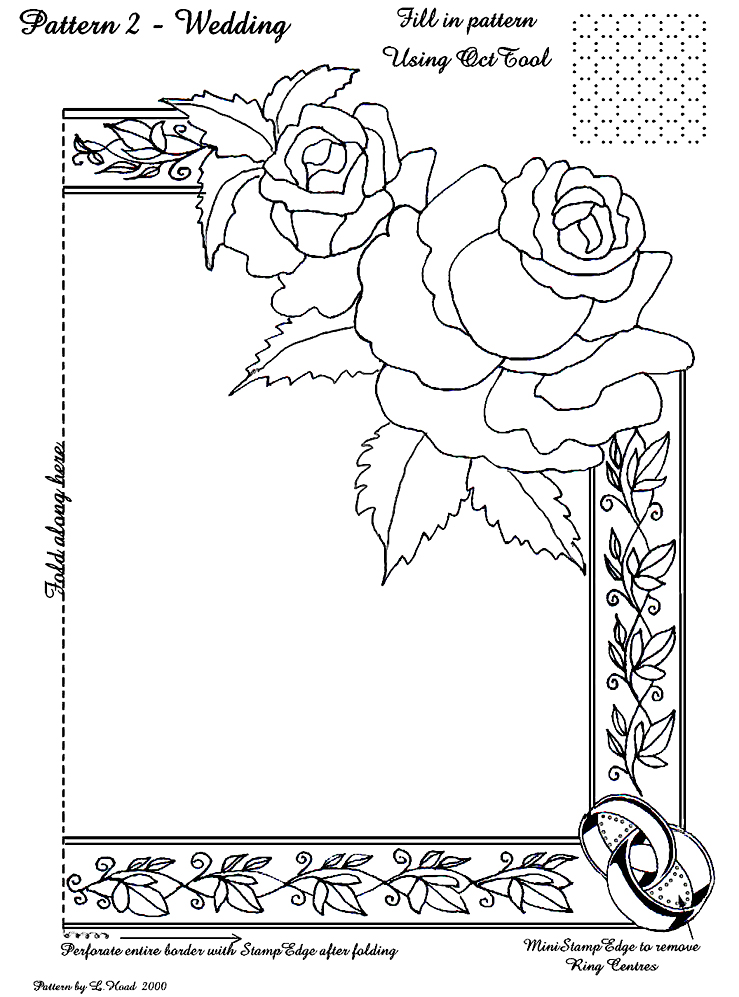
Here is the pattern, click then save as..
Instructions
You will need:
A4 size parchment paper, White and Gold ink and mapping pen, A Regular Mesh grid, Felt tip pens in peach and green, Black coloured pencil and Embroidery Floss to create the tassel. Optional Pearlised oil pastel in cream/white or pale pink/peach for highlighting the rose petals.
PCA Tools required:
The PCA OctTool ( Bold) for the fill in pattern, PCA StampEdge and MiniStampEdge ( Bold) for the outer edge perforations, the PCA Shader and MiniShader to create the embossing on the roses, PCA Scriber to emboss in between the traced border lines and a SmallBall and/or Medium Ball embosser for the dots in the fill in pattern. Perforating and Special embossing mats are also required.
Trace the pattern in Gold ink with a mapping pen in all areas other than the roses which are traced in white. The rings are traced and filled in Gold ink.
Using the PCA Shader and MiniShader in smaller areas, on the reverse side of work, sculpt the petals and leaves in accordance with the method used in the Rose Lesson on this site. The small graphic border is embossed with the medium ball embosser ( the buds) from the front in some areas and reverse in others...see photo.
Use Felt tip pen in Peach or pink to colour the reverse side of the entire rose and green felt tip for the reverse side of leaves. The white embossing that has already been carried out will remain white and the tinting on reverse will show through and give natural looking depth to the work. This method is also used to make the tinting on the reverse side in the details of the small border graphic. Use the pearlised oil pastel to highlight the rose petals on the front of the work.. smudge with your finger or a cotton bud/tip to distribute lightly without using undue pressure and flattening your embossing!
The fill in pattern is made on the front of work upon a regular mesh grid with your page attached with tape to the top and our Perforating Mat beneath. Start in the top left hand corner of the centre portion of card and perforate the resulting 8 hole pattern with the PCA OctTool and as in pattern sample repeat these perforations through the grid until you completely fill the centre section. Then turn over your work and emboss a small dot in the small resulting diamond shape in between each set of OctTool perforations, repeating over entire pattern forming an even square "lace" patch pattern. See the photo.
Use your PCA StampEdge to remove the unwanted edges of the card after folding, through both layers. This includes the small parts inside the rings, but use the MiniStampEdge Bold in smaller areas for ease.
To make the tassel: Plait (braid) white silky 6 strand embroidery thread using 3 strands, long enough to go right through the centre of the spine and have enough left for a tousled tassel at the bottom to hang. Tie a knot at the bottom when attached to card spine and then split each and every one of the threads away from their original strand to give fullness to the tassel.
An insert may be added if you please... larger than the card itself so that the rose cutouts at the top will stand out in contrast against it.